Generative AI Walk-through Series #1 My Avatar (Oct 2023)

Generative AI Walk-through Experience @ Inno Wing

Welcome to the Innovation Wing’s “Generative AI Walk-through Experience,” where the future of creativity and innovation comes to life! Step into a world of endless possibilities as you explore a captivating array of generative AI tools, all thoughtfully curated by our fellow student members. This immersive journey is designed to not only delight your senses but also unveil the remarkable power of the latest generative AI software.

With the “Generative AI Walk-through Experience,” we invite you to unleash your inner artist, designer, or visionary as you experiment with these fascinating tools. Discover how AI can transform your ideas into stunning artworks, generate music compositions, and even craft imaginative stories. It’s all about embracing the fun side of technology while gaining a deeper appreciation for the boundless potential of generative AI.

For those inspired by this captivating experience and eager to dive deeper into the technical intricacies of generative AI, we encourage you to stay tuned to our Generative AI Workshops, hosted by the Innovation Academy. These workshops will provide you with the knowledge and skills to harness the full potential of this cutting-edge technology and take your creativity to new heights. So, whether you’re a seasoned tech enthusiast or a curious beginner, come embark on this exciting journey and unlock the magic of generative AI right here at the Innovation Wing!

Guidance for Using Generative AI Tools and Building Applications

Before proceeding with the tutorial, we kindly request all students to read the ‘Guidance for Using Generative AI Tools and Building Applications‘ carefully. This guideline provides essential insights and instructions on the responsible and ethical use of generative AI tools and applications.

Generative AI Capabilities!

We’re now bringing cutting-edge AI technology to the podcast studio of Innovation Wing! With the help of AI, you’ll be able to generate an avatar and voice model based on yourself, and then sync them together to create a fully AI generated video. This flowchart roughly outlines the production process:

Step 1. Create your own avatar image with Stable Diffusion.

Avatar created with Stable Diffusion

Step 2. Create your own voice model with ElevenLabs.

Step 3. Synchronize the avatar and voice with D-ID.

1. My own avatar image generation

To begin, your first step is to create an AI-generated avatar, which you will later use in the production of your video podcast. Our primary tool for this task is Stable Diffusion, and you can find detailed instructions on how to use it in the sub-page below.

Step 1. Start Stable Diffusion

Look for the Stable Diffusion shortcut on the desktop, it should look like this:

Step 2. Run Stable Diffusion in browser

You should see a Command Prompt window pop up (as shown in the figure).

Once you see the line “Running on local URL: http://127.0.0.1:7860” in the Command Prompt, click the link to run Stable Diffusion in your browser. 

(Note: do NOT close the Command Prompt window, or the connection will be terminated.)

Step 3. Understanding some main features of the Stable Diffusion interface  

  • Choose txt2img model or img2img model 
    txt2img model takes your text description, which we call it a text prompt, to generate an image
    img2img model generates an image based on an uploaded image (e.g., a picture of you) and a text prompt.
  • Let us proceed with txt2img model as our first trial, and you can come back to this step later to try out img2img model with your image.
  • Enter prompt  
    Prompt describes the features or qualities you want the generated image to have.

You can use the following prompt as as first trial

professional portrait photograph of a handsome Asian men in summer clothing with trendy mid-length hair style, wrinkle, handsome symmetrical face, cute natural makeup, ((standing outside in photo studio with solid dark background)), professional soft lighting, camera front facing, ultra realistic, concept art, elegant, highly detailed, intricate, sharp focus, depth of field, f/1. 8, 85mm, medium shot, mid shot, (centered image composition), head center, (professionally color graded), ((bright soft diffused light)), volumetric fog, trending on instagram, trending on tumblr, hdr 4k, 8k

  • Negative Prompt
    Features or qualities you want to avoid during image generation.

You can use the following negative prompt as as first trial

(bonnet), (hat), (beanie), cap, (((wide shot))), (cropped head), bad framing, out of frame, deformed, cripple, old, fat, ugly, poor, missing arm, additional arms, additional legs, additional head, additional face, multiple people, group of people, dyed hair, black and white, grayscale, head outside frame

  • Sampling Steps
    How many times to regenerate the image. Higher values take longer and are generally better; low values are faster but worse.
  • At the first trial, please set this parameter to 50.
  • CFG Scale
    How strongly the image should conform to the prompt – lower values produce more creative results, higher values follow prompts more strictly.
  • At the first trial, please set this parameter to 7.

Step 4. Save the PNG image of you avata

If you’re happy with your generated image, right-click the image and download it. You should end up with a PNG Image of your avatar. Save this image, as we will be using it in later steps.

2. My own voice model generation

After completing the previous step, you’ll need your own voice model to sync onto your newly created avatar. The main software we use in this walkthrough is ElevenLabs, which uses recorded samples of a voice to generate a model and then uses text-to-speech to generate similar-sounding voice clips.

Step 1. Record voice clips of yourself

  • First of all, you’ll have to record 2-3 voice clips of yourself talking, which you will later upload to ElevenLabs to train the AI voice model. You can record these clips using the Sound Recorder app, which you should be able to find on the taskbar.
  • The link below will give you some passages to read, which should capture the varieties of your voice fairly well.
  • Once you have both the passages and the Sound Recorder app open, press the red circle icon on the Sound Recorder app to record your voice clips.
  • Record around 2-3 voice clips of yourself reading out any of the above passages. (Note that sound **quality** is usually more important than **quantity** (duration) for the sample clips. Try and speak as clear as possible, in an environment with little to no background noise.) 
  • Once recorded, click the 3 dots and then click ‘Show in folder’ to find your voice recordings. They should be in .m4a format.

Step 2. Open Elevenlabs

  • Once you have your voice clips prepared and ready, go to https://beta.elevenlabs.io/. 
  • The Podcast Studio PC should already be logged to the Innowing account, but if not, ask a tutor to help you sign in.

Step 3. Voice Cloning

  • Click “VoiceLab”,
  • Click “Add Generative or Cloned Voice”, and then
  • Click “Instant Voice Cloning.

From here, you can name your voice model, and upload the previously recorded sample clips.

Step 4. Training of the AI voice model

  • Click “Add Voice” once finished to begin the training of the AI voice model.

Step 5. Fine-tuning of the AI voice model

  • Once finished training, click “Use” under your newly created voice model. From here, you can adjust the voice settings and test a few speeches to fine-tune your AI voice. .
Step 6. Prepare the AI synthesis read
  • Once you are happy with your voice settings, enter what you want your AI voice to say for the video into the text box.
  • Please make sure this sentence is included:
Come join us at the Innowing to learn more about Generative AI, and gain access to cutting-edge AI resources and software.
  • This will be part of the submission criteria later, when you upload your finished video.

Step 7. Save the MP3 file of your AI voice clip

  • Once you’ve entered that, along with whatever else you want your avatar to say, hit the “Generate” button, and then click the download button to save your AI voice clip. You should end up with an MP3 File; save it, as we will be using it in the next step.
3. Synchronize voice and avatar

Once you have both your avatar (PNG Image) and the voice clip (MP3 File) from the previous steps, you’re going to sync the voice clip onto the avatar using an online software called D-ID, creating a finished video. The steps are outlined in the below sub-page.

Step 1. Access to D-ID

  • Go to https://studio.d-id.com/
  • Click on “Guest” in the bottom-left, and click “Login/Signup”.
Step 2. Create your own account
  • Use your email, Google account or LinkedIn to create a free trial account.
Step 3. Create video
  • Click “CREATE VIDEO” in the top-right.

Step 4. Add your previously created avatar PNG file

  • You can either click “ADD” to upload your previously created avatar PNG Image, or you can try out D-ID’s built in AI avatar generator.

Step 5. Switch to non-premium voice

  • Once the avatar is uploaded, in the “Script” tab, make sure the selected Voice is not a premium voice, since those require a paid plan. Switch to any non-premium voice, we will not be using the voice in this walkthrough.
Step 6. Add the audio MP3 file
  • Then, click “Audio” in the top-right, upload your previously created MP3 File, and
  • then click “Generate Video” in the top-right once you are satisfied.
4. Submit your AI video to Moodle

Save the generated video and upload to Moodle as a completion of the walkthrough

Please make sure your AI reads the following:

Come join us at the InnoWing to learn more about Generative AI, and gain access to cutting-edge AI resources and software.

We will create a combined video with all submissions made by our members as a promotion video of our Innovation Wing, let’s learn and build AI technologies here! 🙂

Some sample videos created by the tutors and the designers of this walkthrough

Congratulations! You should now have a finished, fully AI-generated video, made in your image! Please feel free to save the video to your own device, and we hope you enjoyed this Generative AI Walk-through experience. However, this walk-through was just the tip of the iceberg – if you would like more technical knowledge or involvement in more Generative AI projects, stay tuned for the many more exciting AI-themed activities on the way — workshops, tutorials and more! See you soon!
Extra: Trying more prompt

text2img (Text-to-image)

Prompt
male medieval assassin, dungeons & dragons rogue class, shoulder length hair, long hair, long flowing black hair, handsome, rugged, portrait, presentation, Masterpiece, Studio Quality, 4k, solo, solemn expression, neutral expression, handsome symmetrical face, chiseled jaw, medieval background, camera front facing, concept art, elegant, highly detailed, intricate, sharp focus, (((medium shot))), (centered image composition), head center, (professionally color graded), trending on instagram, trending on tumblr, hdr 4k, 8k, visible face, clear face, ((bright soft diffused light)), full head, (((head centered in frame))), unhooded
Negative prompt
(bonnet), (hat), (beanie), cap, (((hooded))), ((head not centred)) (((wide shot))), (medium shot), (cropped head), bad framing, shadowed face, hooded face deformed, cripple, old, fat, ugly, poor, missing arm, additional arms, additional legs, additional head, additional face, multiple people, group of people, dyed hair, black and white, grayscale, head outside frame, un-detailed skin, semi-realistic, cgi, 3d, render, sketch, cartoon, drawing

text2img (Text-to-image)

Prompt
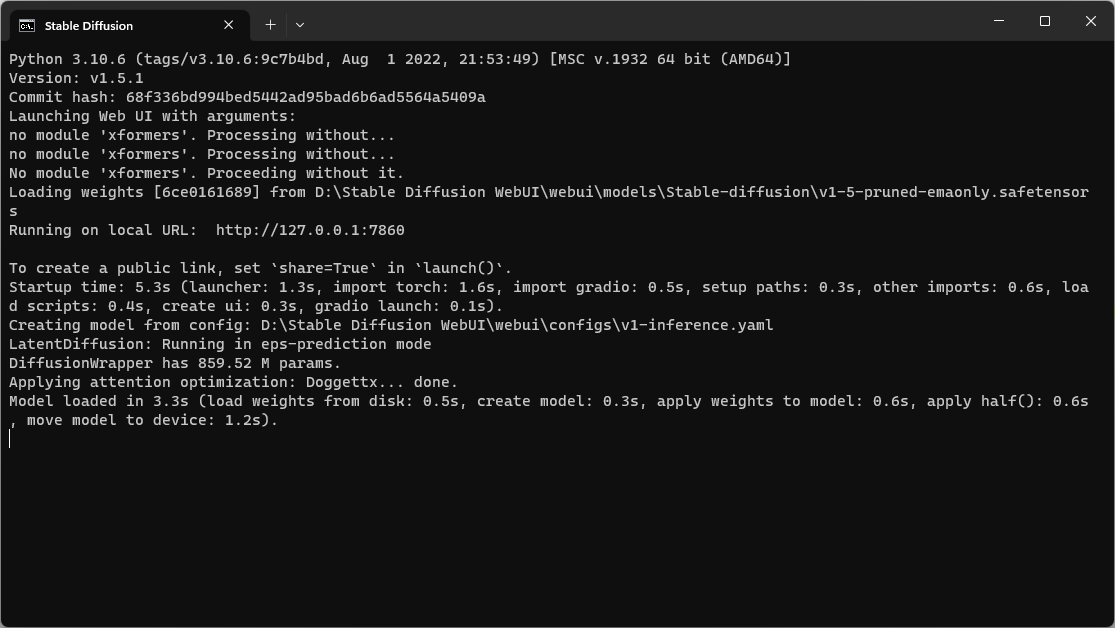
female futuristic cyberpunk 2077, ((daytime)) sci-fi, vibrant colours, neon colours, dyed hair, bright eyes, cybernetic implants, beautiful, portrait, presentation, Masterpiece, Studio Quality, 4k, solo, solemn expression, neutral expression, symmetrical face, futuristic background, camera front facing, concept art, elegant, highly detailed, intricate, sharp focus, (((medium shot))), (centered image compos1ition), head center, (professionally color graded), trending on instagram, trending on tumblr, hdr 4k, 8k, visible face, clear face, ((bright soft diffused light)), full head, (((head centered in frame))), volumetric fog, professional soft lighting
Negative prompt
(bonnet), (hat), (beanie), cap, (hooded), ((head non-centered)) (((wide shot))), (medium shot), (cropped head), bad framing, shadowed face, hooded face deformed, cripple, old, fat, ugly, poor, missing arm, additional arms, additional legs, additional head, additional face, multiple people, group of people, black and white, grayscale, head outside frame, un-detailed skin, semi-realistic, cgi, 3d, render, sketch, cartoon, drawing

img2img (Image-to-image)

Prompt
3D cartoon lady Disney Pixar style animation, sharp and beautiful faces, orange bright tint, By Greg Rutkowski, Ilya Kuvshinov, WLOP, Stanley Artgerm Lau, Ruan Jia and Fenghua Zhong, trending on ArtStation, made in Maya, Blender and Photoshop Faust, octane render, excellent composition, cinematic atmosphere, dynamic dramatic cinematic lighting, aesthetic, very inspirational, arthouse, face only, centred face, symmetrical face, front-facing, eyes looking forward, clear undeformed eyes
Negative prompt
(((wide shot))), ((cropped head)), hands, fullbody shot, bad framing, out of frame, old, deformed. unrealistic, fat, ugly, missing arm, additional arms, additional legs, additional head, additional face, multiple people, group of people, black and white, grayscale, head outside frame
Uploaded image (from the internet).
Image generated by Stable Diffusion.
Extra: What about AI singing?

If you have time and want to explore further, you can additionally use a software known as RVC WebUI to generate an AI singing voice.

Step 2. Train your own voice model

  1. Enter the experiment name (name your voice model)
  2. Enter the path of the training folder (where you put your voice files)
  3. may try different parameters or just leave them unchanged
  4. Click “One-click training”

Step 3: Vocals/Accompaniment Separation

  1. Enter the path of the audio folder to be processed (Where you put the original file of the song you want to sing)
  2. Specify the output for vocals and accompaniment
  3. Use HP2_all_vocals(with best performance)
  4. Click “Convert”

Step 4: Model Inference

  1. “Refresh voice list and index path” and choose your voice model from the list
  2. Transpose the key if needed
    For accompaniment, use https://transposr.com/
  3. “Auto-detect index path and select from the dropdown”
  4. Enter the path of the audio file to be processed(vocal file)
  5. “Convert”