Acrylic laser cutting and engraving machine Session2
Tutorial designed by: Boris Lee and John Lu, Innovation Wing tutor
Usage arrangement
TRAINED MEMBERS
Access permission
CHECK-IN-OUT WITH STAFF
Requirement before usage
WITH
TUTORS
Buddy system requirement
[For trained members] Only members who go through the training tutorial on this page can use the GCC LaserPro Spirit acrylic laser cutting and engraving machine.
[Talk to us] Before using our acrylic laser cutter, please fill the acrylic laser cutting job registration form. If you do not have a project supervisor, please contact our staff (Director of Innovation Wing/ technical staff/ tutor staff), we are very happy to help you.
[Operate the machine with tutors/technicians] Please operate the acrylic laser cutter with the presence of our tutors/technicians, they are experienced operators and are very happy to help.
Usage procedure for trained members
Acrylic laser cutting registration form
ABOUT THE USE OF ACRYLIC SHEETS
Members can only use the acrylic sheets provided by Innovation Wing.
Any special requests have to address to the technical manager of Innovation Wing.
The used acrylic sheets in the “Free to use” box is free.
If a member uses a new acrylic sheet, please mark the number on the registration form.
Innovation Wing Office may request the user to restock new acrylic sheets from the same vendor used by the Innovation Wing.
Members please come to Innovation Wing and talk to our on-duty tutors/technicians.
Innovation Wing tutor/technician will go through the cutting file with members and do a final confirmation of the cutting parameters.
Once confirmed, members can fill the acrylic laser cutting registration form
General safety recap from the official user manual
The resulting debris from laser cutting is very dangerous and may cause a fire hazard.
DO NOT leave debris and scraps inside the laser machine after the job finished. Always keep the machine clean after the job finished.
Always remove the vector grid to clean any small pieces that have fallen through the grid.
LASER RADIATION WARNING: Exposure to laser radiation may result in physical burns and severe eye damage. Proper use and regular maintenance of this machine is important to the safety of all people in the immediate area.
Prior to operation, carefully read and familiarize yourself with the warning labels located on both the laser system and in the user manual.
Never leave the machine unattended during the laser cutting and engraving process. The laser may ignite combustible materials. A well-maintained fire extinguisher and operational smoke or fire detector should be kept in the vicinity of the machine.
Caution—Use of controls or adjustments or performance of procedures other than those specified herein may result in hazardous radiation exposure.
Enable the SmartAIR™ nozzle when engraving or cutting materials that may easily ignite, such as acrylic, wood, or paper.
Always wear safety goggles when the laser system is in operation. Reflective materials such as mirrors, enameled brass, and anodized aluminum may partially-reflect some of the invisible laser radiation. Severe eye damage may occur if proper safety goggles are not worn.
Connect the machine to a properly grounded power outlet. Ensure the voltage of the power source is identical to the voltage of the machine.
Do not open the laser access panel when the machine is plugged in.
Do not attempt to modify or disassemble the laser module.
Do not attempt to remove or modify any component of the machine’s laser interlock safety system.
Ensure the immediate work area of the machine is well-ventilated. Odors, vapors, and dust are by-products generated during the laser engraving and cutting process. An exhaust system is already installed in the Innovation Wing laser cutting room.
Do not laser heat-sensitive surfaces or materials that may generate toxic fumes, such as PVC and Teflon.
Regularly clean and maintain the machine according to the cleaning and maintenance instructions in Chapter 8 of the user manual. Doing so will ensure the machine will operate effectively and safely over a long period of time.
A demonstration of clearing the debris from laser cutter
Video demo created by our tutor Boris Lee and John Lu from the Innovation Tutorship Training Scheme on Mar 2021.
Operational guideline (to be completed by tutor/technician/training member)
This operational guideline is a walkthrough of the general procedure in using the Acrylic laser cutting and engraving machine in Innovation Wing. You will act as a member and go through this process once.
Step 1. Talk to on-duty tutor/technician.
Step 2. Fill in the job registration form by members.
Step 3. Import into CorelDraw.
Step 4. Turn on and initialize the acrylic laser cutting machine.
Step 5. Start cutting and monitor the cutting process.
Step 6(Optional). Select a prepared grayscale image and engrave.
Step 7. Switch off the machine and clean up the workspace for the next user.
After the tutorial, you will create your acrylic name badge and will understand some basic operation principle of the acrylic laser cutting machine.
Step 1. Talk to on-duty tutor/technician staff.
CHECK-IN-OUT WITH STAFF
Requirement before usage
1.1. Members come to Innovation Wing and talk to our tutors/technicians.
1.2. Only members who go through the training tutorial on this page can use the GCC LaserPro Spirit acrylic laser cutting and engraving machine.
1.3. Innovation Wing tutor/technician will go through the drawing file and double confirm the cutting configuration and materials.
2.2. Tutor/technician will check received registrations.(Please use the login account mentioned in the staff training workshop to check the following registration list.)
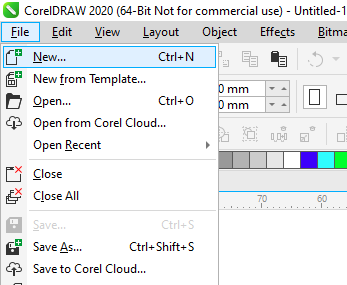
3.1 First you need to create a New file. Go to File → New.
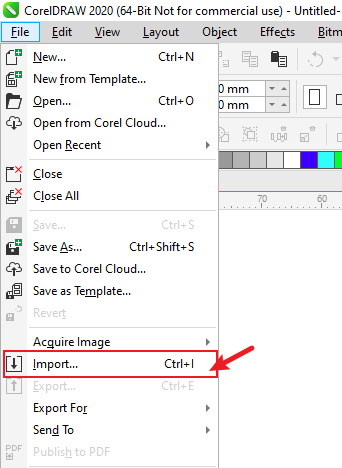
3.2 File → Import: Go to File → Import, import the file from the desktop.
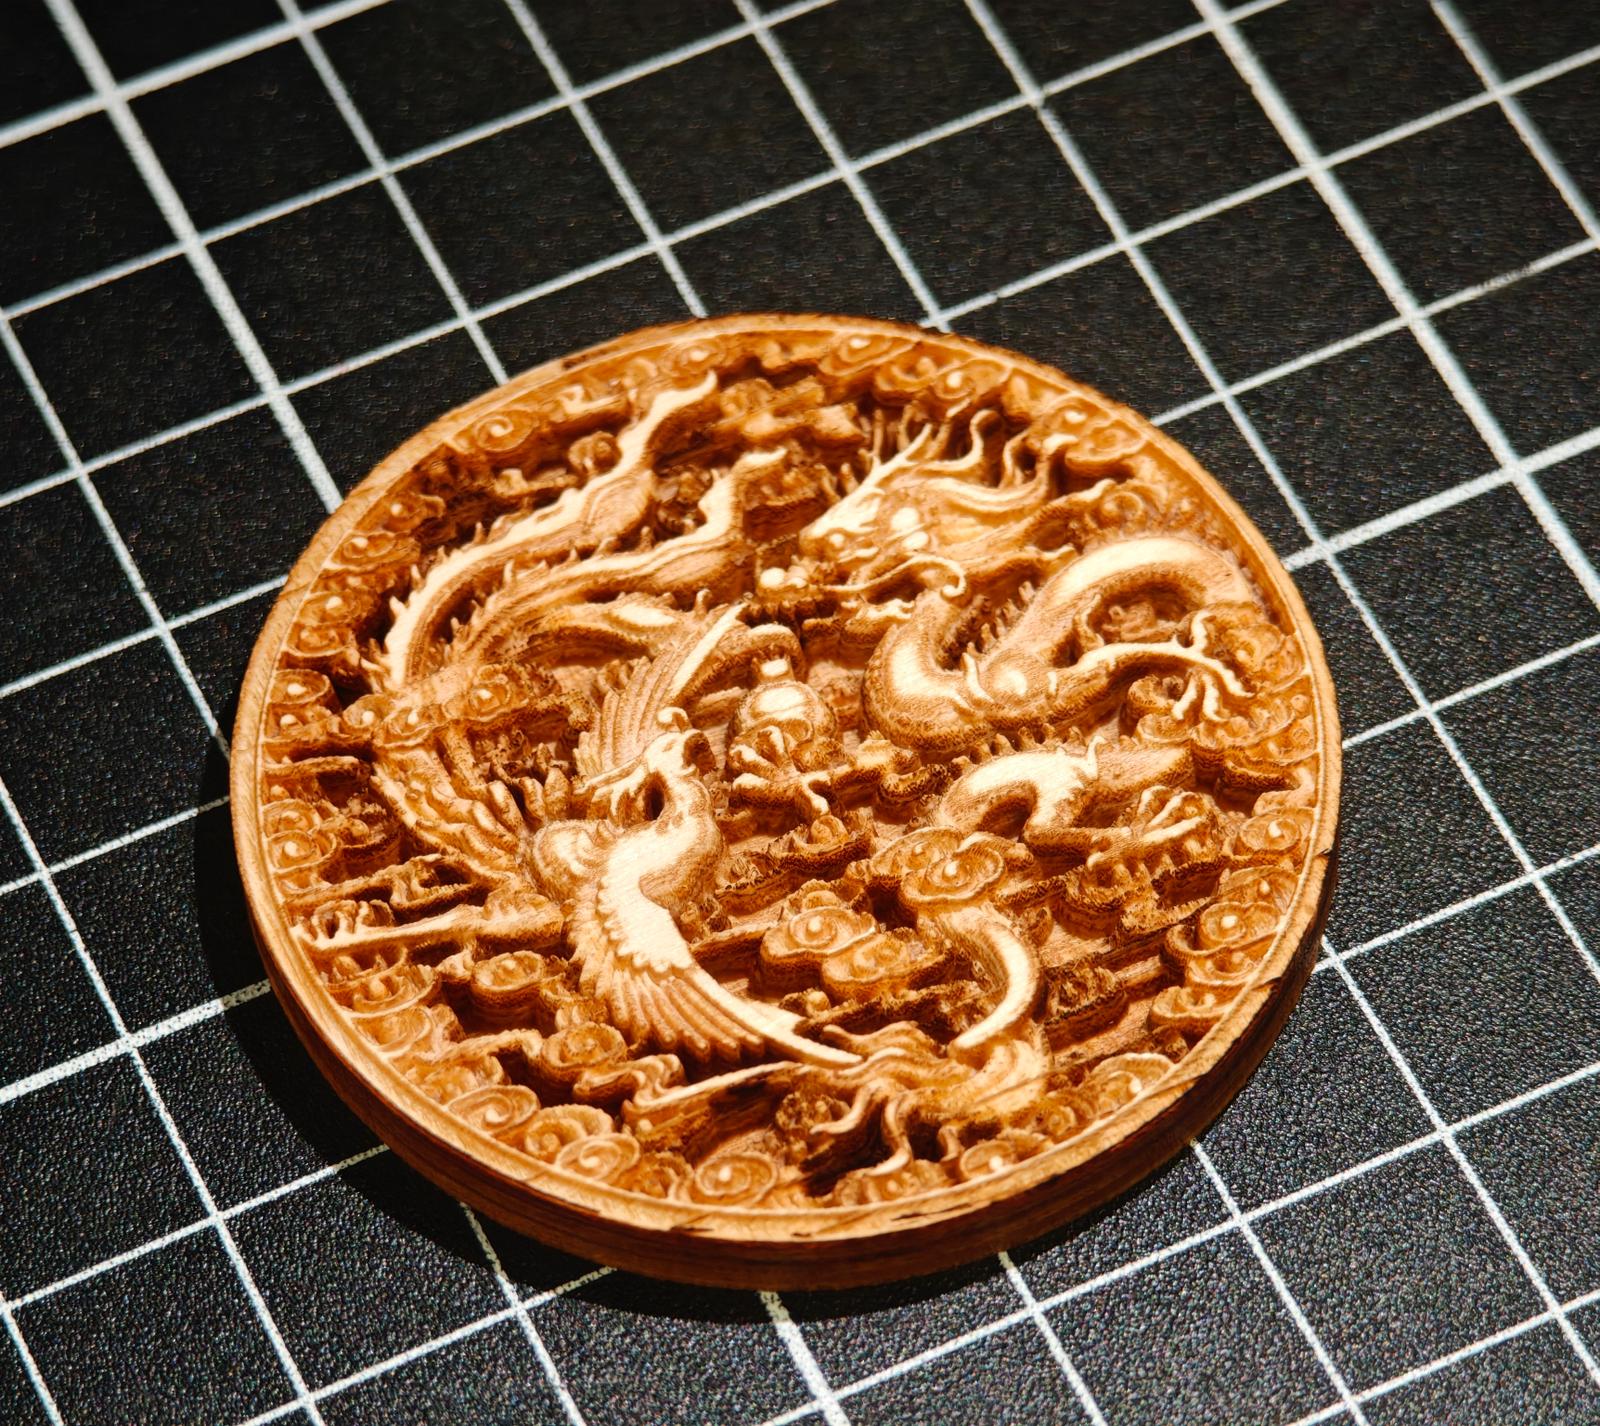
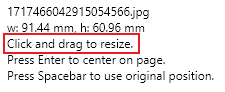
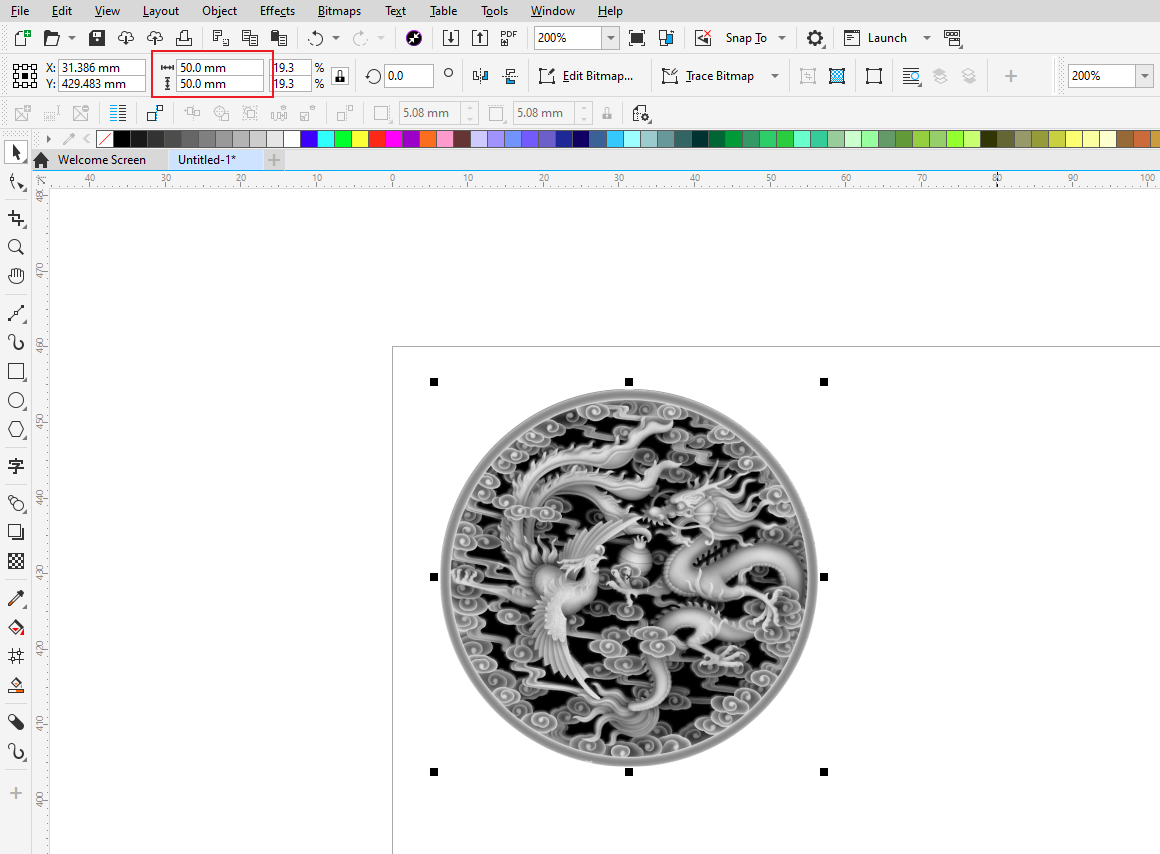
3.3 Click and drag to resize the photo.
3.4 Select the photo and resize the object to 50mm*50mm. You can click the lock if you want to change the height and width at the same time.
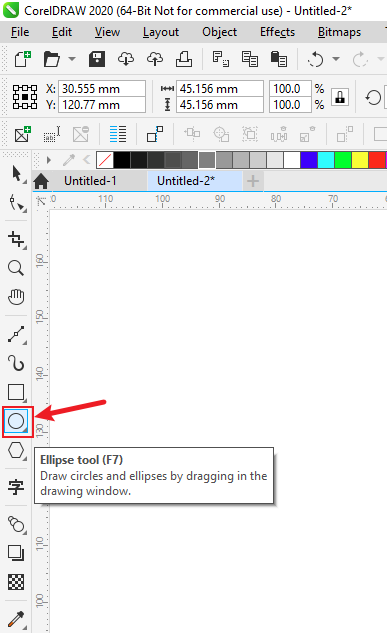
3.5 Draw a circle by dragging in the drawing window.
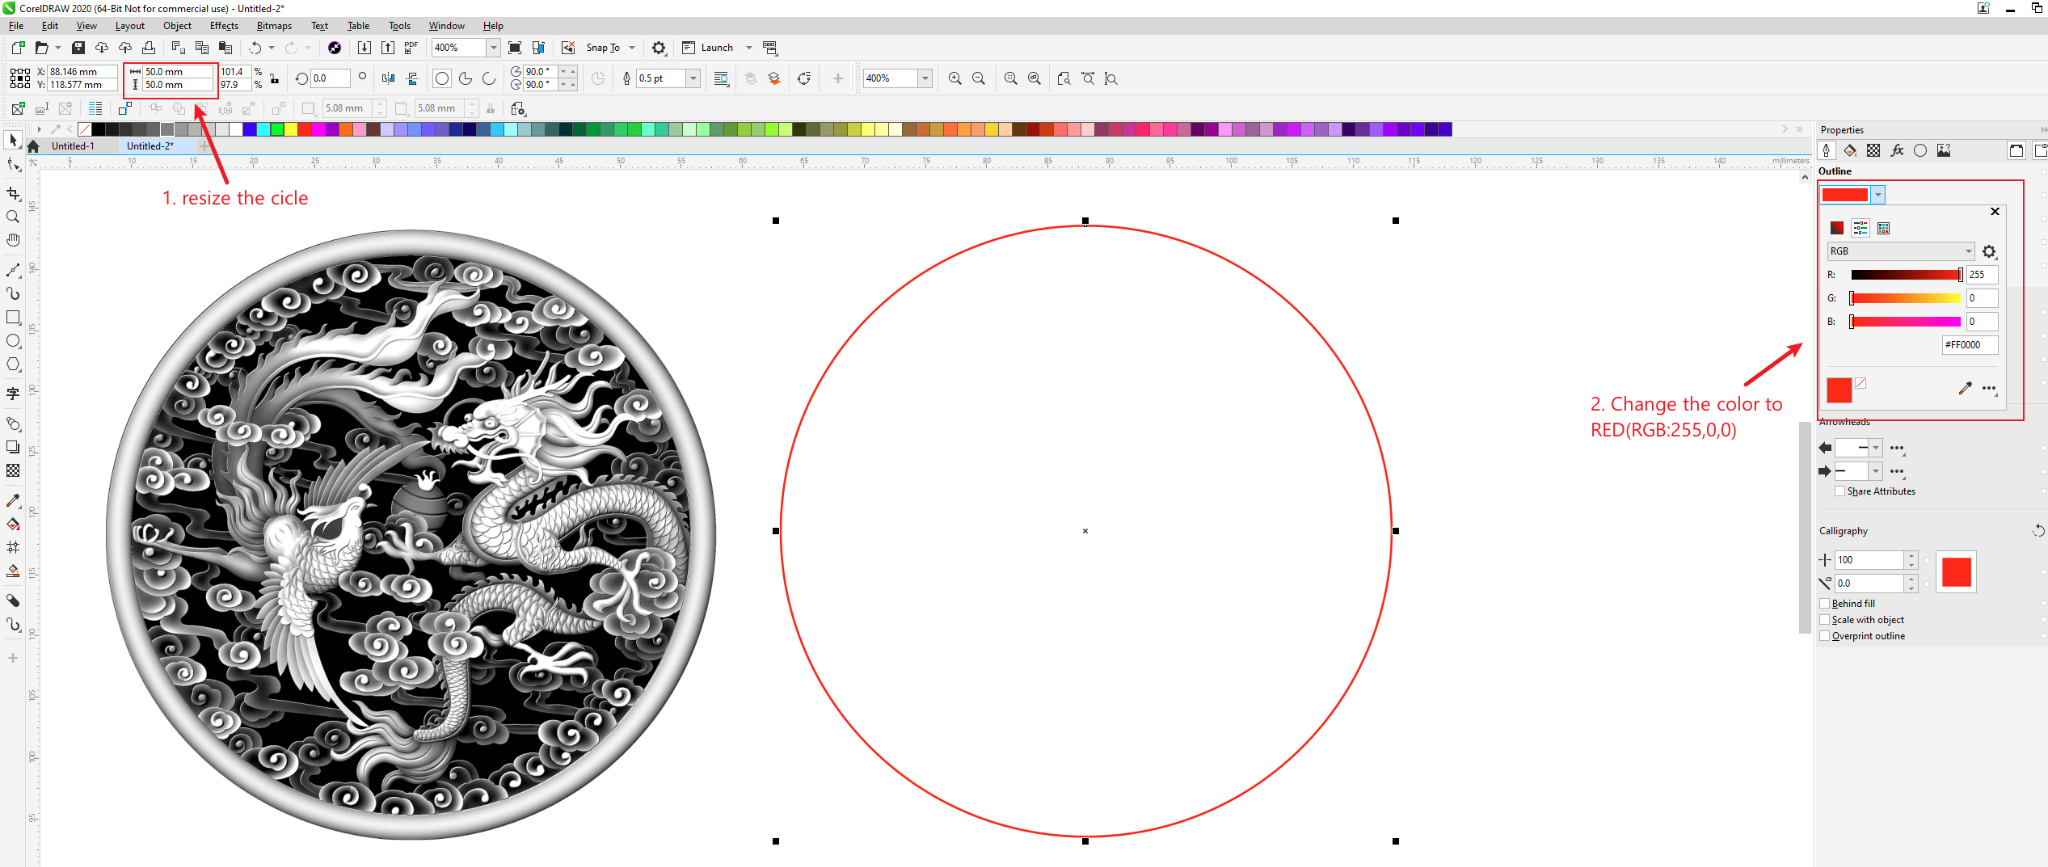
3.6 Select the circle and resize it to 50mm*50mm. And change the colour of the circle to RED.
Remember to change the circle type to Hairline.
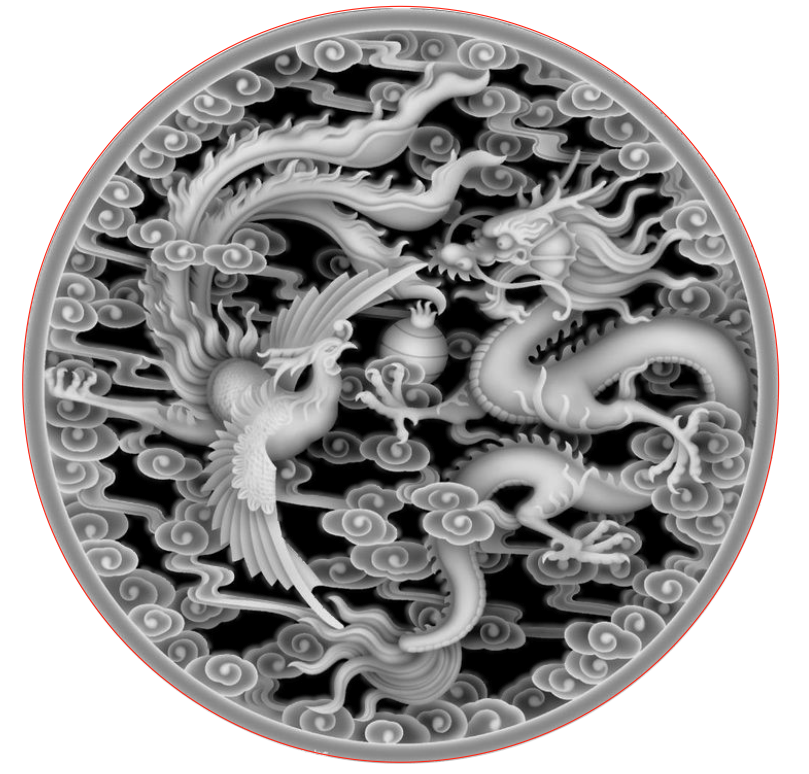
3.7 Drag the circle to fit the size of the image. Red circle → Border of photo.
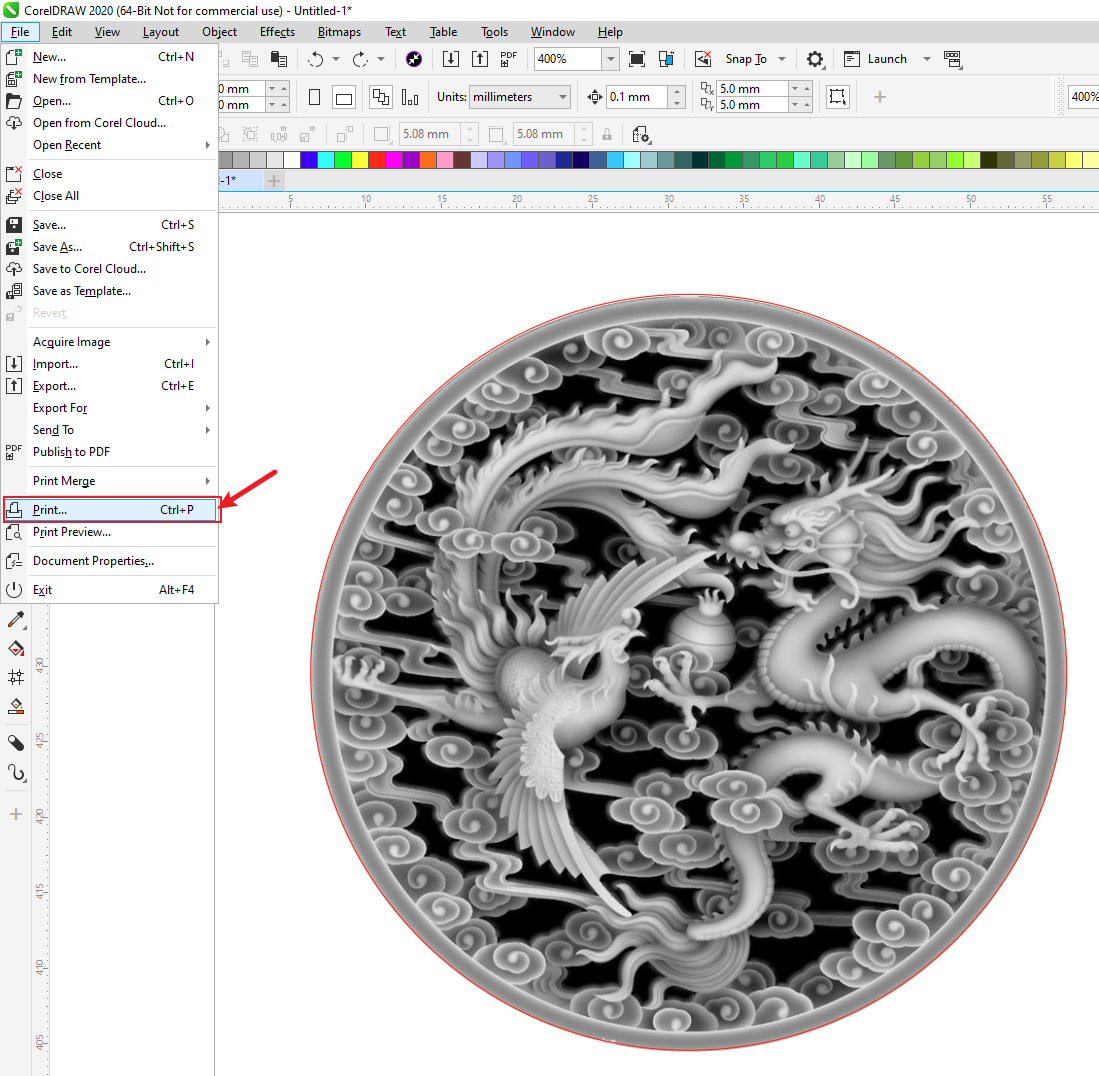
3.8 Go to File → Print
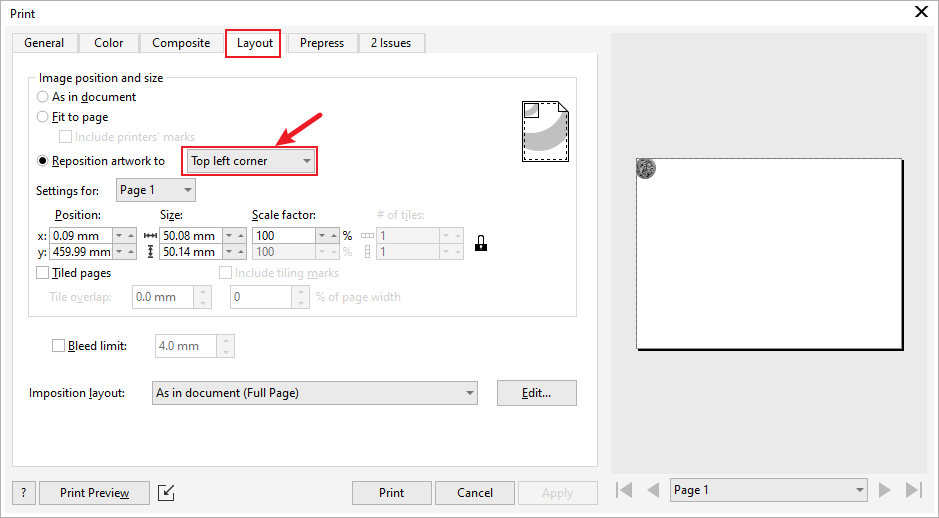
3.9 In the pop-up window, Go to Layout → Choose ‘Top left corner’ in Reposition artwork.
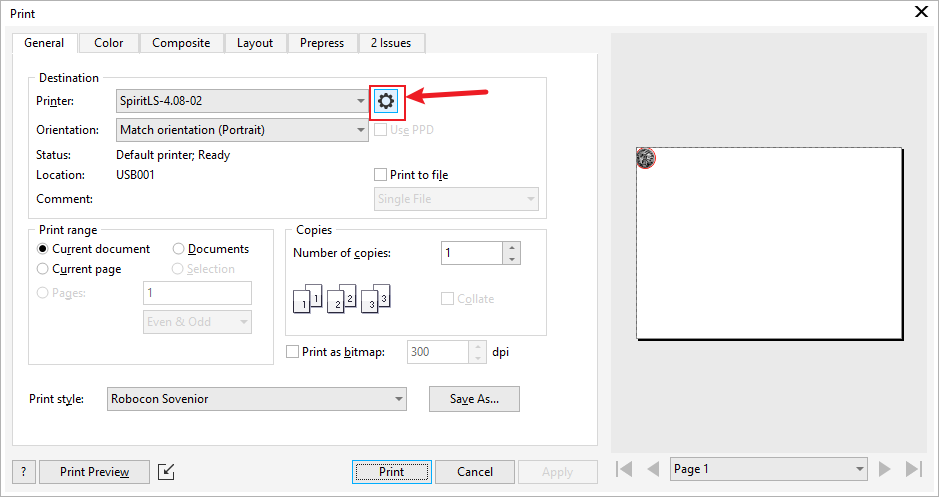
3.10 In the pop-up window, Go to General → click the setting button in General.
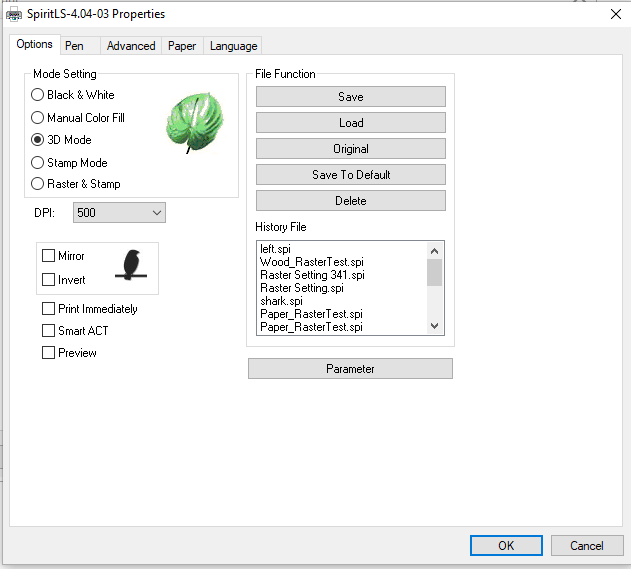
3.11 Select 3d mode. The DPI setting below determines the level of detail for the 3D-engraved image. Higher DPI will cost a longer time. For the sake of time, leave it at 500.
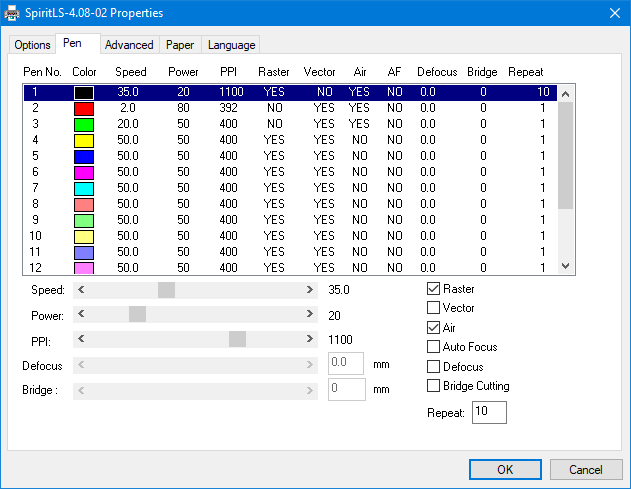
3.12 Due to the difference in the grayscale from rendering the height map, the settings are not one-size-fits-all. For the image (Black Pen), start from a speed of 35, and a power of 20, the PPI of 1100, then tick Raster, Air, then set Repeat to 10, which will allow it to engrave eleven-times. Adjust the settings as you experiment with the parameters.
There are some examples, assuming you are using a 5mm wood board:
For the left machine: speed 30~35, power 30, PPI 1100, repeat 10 times
For the right machine: speed 30~35, power 20, PPI 1100, repeat 10 times
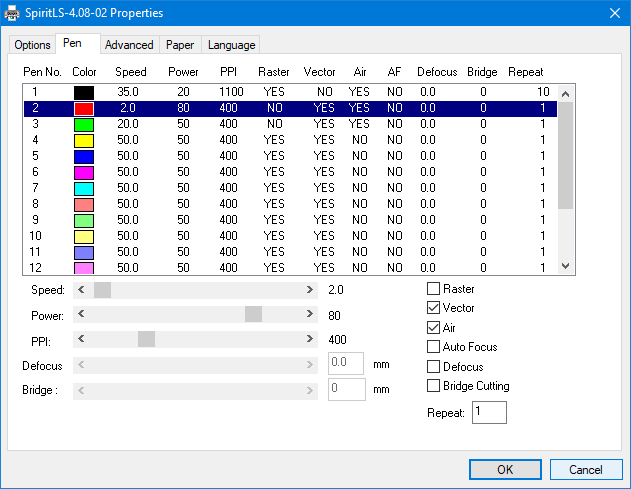
3.13 For the boundary(Red Pen), assuming you are using a 5mm wood board, set the speed to 2, and the power to 80, and the PPI to 400, repeat 1 time. Tick Vector and Air. For different wood boards, we should adjust the parameters, referring to the parameters on the wood board.
3.14 Then click OK, pending to the next step. Apply → Print, remember to Apply before you Print it.
Step 4. Turn on and initialize the acrylic laser cutting machine.
WITH TUTORS
Buddy system requirement
ABOUT THE OPERATION OF THE ACRYLIC LASER CUTTING & ENGRAVING MACHINE
The following steps should be done with the presence of Innovation Wing tutors/technicians.
Even a member is trained user of the acrylic laser cutting machine, he/she has to operate the machine with the presence of Innovation Wing tutors/ technicians.
4.1. Switch on the power source for the acrylic laser cutter
4.2. You will see the red light blub is on and hear the pump of the laser cutter starts running.
4.3. We also installed an air filter to further filter the exhaust during the cutting process (some plastic burn smell and is not good for health if inhaled).
Switch the air extraction system from ‘OFF’ to ‘Local’ to activate air extraction.
The fan rotation speed should be above 5000 rpm.
4.4. Turn on the power button of the acrylic laser cutting machine. The button is on the right hand side of the machine.
You will see the light inside the cutter chamber of the laser cutter is on.
4.5. A power indicating lamp would light up and the machine panel would indicate ‘Table Down Please Wait’.
4.6. Wait for the machine to perform initialization and automatic leveling before opening the machine door. This would take around one minute.
4.7. Open the machine door.
4.8. A door indicating lamp would light up.
4.9. Place a 5mm thick acrylic sheet on the top left hand corner of the cutting platform. Remove any covering paper on top of the acrylic sheet.
Attention!! Do not contact the focusing tip of the pointer when placing the acrylic sheet onto the platform. Breaking the tip could lead to malfunctioning of machine
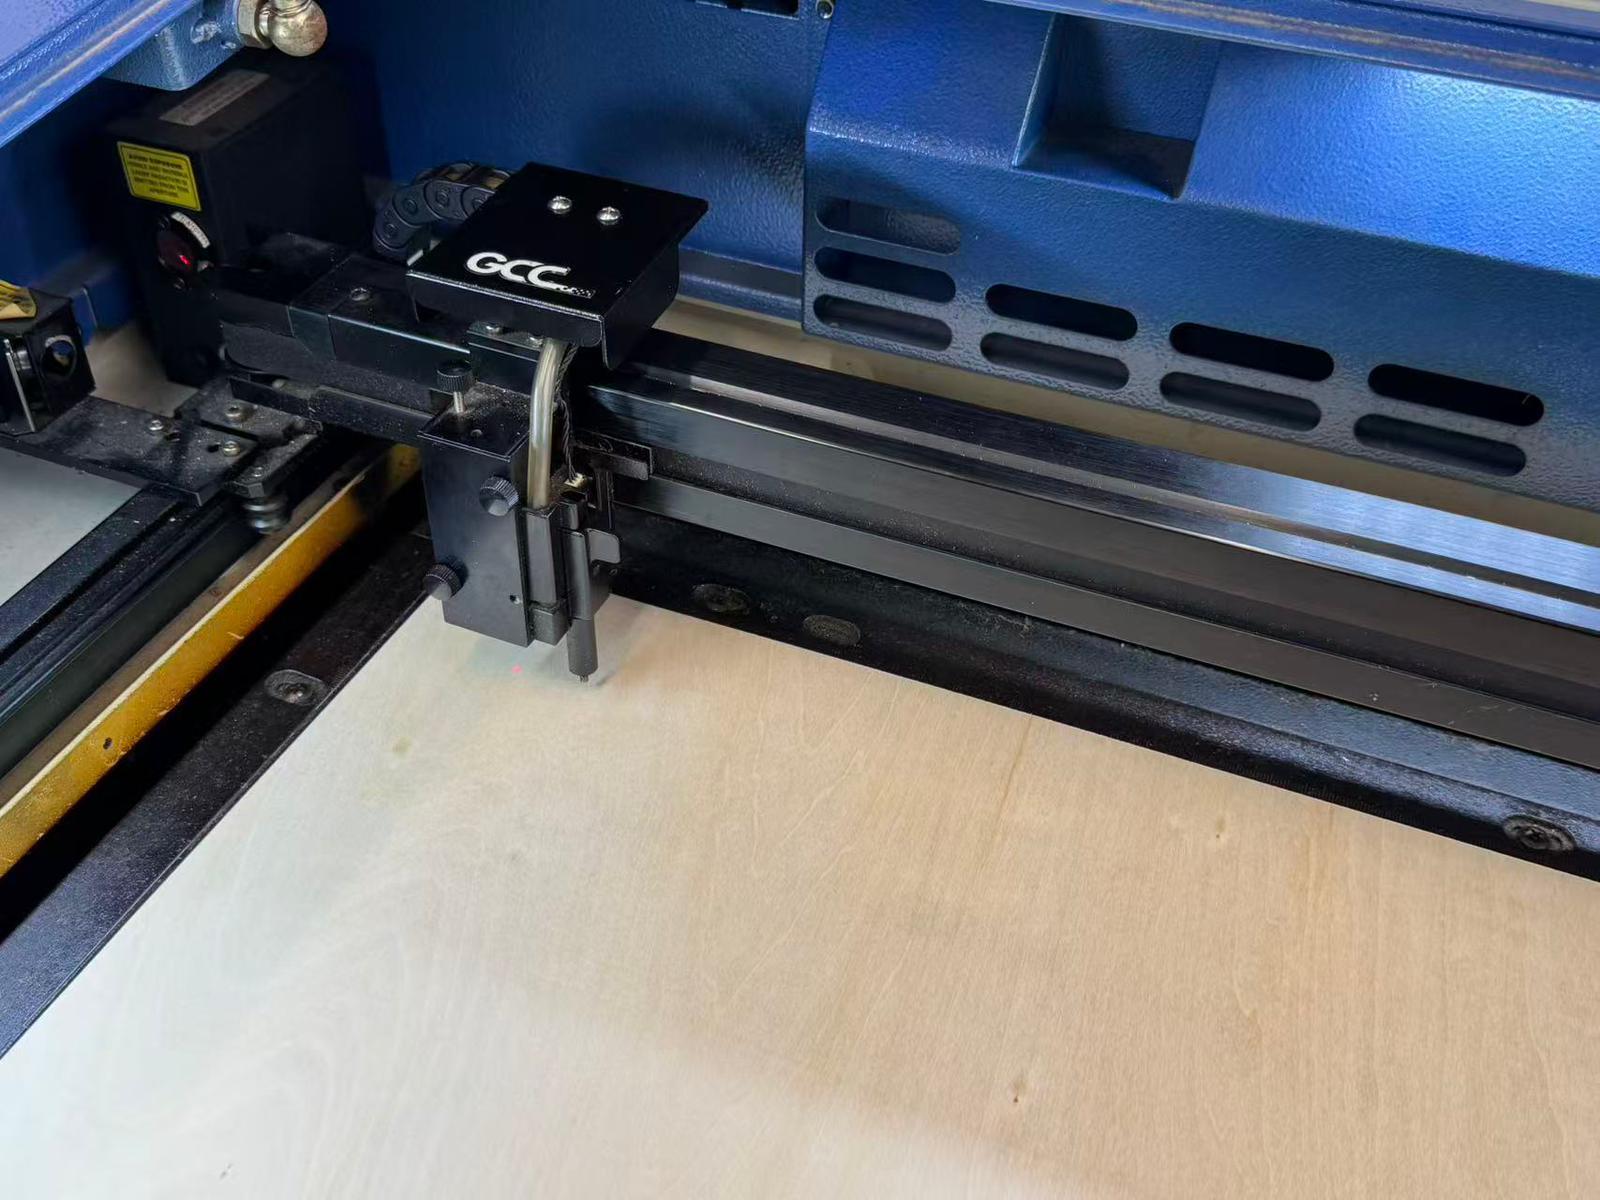
4.8. Now we adjust the starting position of the cutting.
There is a small red dot that marks the laser pointer’s location.
Make sure your hand is dry, and gently move the cutting pointer to the location on the sheet where you want to start the cutting.
We have to make sure that the acrylic sheet is big enough for the cutting job. Sometime we will reuse acrylic sheets that was cut previously and therefore we need to check carefully before proceed to the next step.
4.9. Now we have to do auto-leveling for the laser head.
Close the cover door.
Press the ‘Auto Focus’ button on the panel to start auto focusing.
4.10. You will see the grid platform moves up, and then the laser head sensor will touch the acrylic sheet and the platform moves down a little and then stops. This is the process of auto-leveling.
Now please leave the laser cutter intact and proceed to the next step.
Step 5. Start the cutting job and monitor the cutting process.
5.1. Now we are ready to start the cutting job. Before starting, let’s have the following check:
The air filter is on.
The acrylic laser cutter is on and the air pump is working (you can hear the fan’s noise).
The door of the acrylic laser cutter is closed.
The settings done in the previous steps are intact.
There is no debris and scraps inside the laser machine. There are no small pieces under the grid from previous cuttings. The debris are very dangerous and may cause a fire hazard if not removed.
5.2. Click Apply and then Print in the software,
5.3. The machine panel would indicate ‘File order + File name’.
If you cannot see it, you may press F1 to back to the main panel and you will see the file name.
5.4. Trial run without the laser
Switch off the laser key to perform a trial run without a laser.
Press ‘Start/Stop’ to start a trial run.
The laser cutter will start running a path without laser
Inspect and check the path to see if the settings are correct
5.5. ATTENTION: In case of any accident or abnormal situations, press the Emergency button to stop the machine and report to on duty tutors and technicians at once
5.6. Real laser cutting
Switch on the laser key
Press ‘Start/Stop’ to start cutting
5.7. Monitor the entire cutting process.
ATTENTION: User is required to monitor the entire laser cutting process and has the responsibility to report any accident or abnormal situations.
Note that if the cutting and engraving effect is not good enough (e.g., too deep or too shadow), you may need to back to Step 5.6 and do some adjustments for the SPEED & POWER for the Pen for the best cutting/engraving results.
After the cutting is finished, DO NOT OPEN THE MACHINE DOOR IMMEDIATELY.
Wait for 30 seconds and let the air pump and filter remove the smell.
5.8. Retrieve the item.
Open the door
Manually move away the cutting pointer to the top left corner of the cutting platform to avoid hitting and damaging the cutting pointer when retrieving the acrylic board.
5.9. Take out the acrylic sheet together with the figure cut. Again, beware of the focusing tip of the pointer when taking out the sheet.
After collecting the object, please show this to the technical manager (Seto) for recording the completion of this tutorial.
Innovation Wing tutors please put this badge inside your tutor badge when you are on-duty
Step 6 (Optional). Select a prepared grayscale image and engrave.
6.1 Student can optionally engrave a piece from the provided grayscale images from the link below. Start from the similar parameters and experiment with them.
Step 7. Switch off the machine and clean up the workspace for the next user
Please power off the acrylic laser cutter, filter and pump.
Please clean and tidy up the workspace for the next user.
Please put the used acrylic sheet in the “free to use” box for the other users. Thank you so much 🙂
Acknowledgement
This tutorial is prepared by our tutor Boris Lee and John Lu from the Innovation Tutorship Training Scheme on Dec 2020.
This tutorial is edited by CS Seto (technical manager of Innovation Wing), Edison (technical staff of Innovation Wing) on Jan 2021.
Materials from this tutorial include some recap of the official user manual from GCC LaserPro Spirit. With some additional materials added by our staff.
For Inquiries, Please Contact
Please contact
Karlos Ma (karlos16[at]hku.hk), the teaching assistant of the Tam Wing Fan Innovation Wing, or
Ryan Chan (ryancck[at]hku.hk), the senior technical assistant of the Tam Wing Fan Innovation Wing